Today we’re discussing how to:
Use html borders to make boxed off sections on a blog page.
Use a url to make functional Tweet, Pin & Share boxes for a specific item with your original image.
I learned something new and exciting this weekend while working on and improving the ebook landing page. I’m a novice at html code so when I learn something new, I like to share it! Someone asked me about the borders and functional buttons on my Abc’s of Eclectic Homeschool landing page, so I’m going to use those for examples. There are two cool features to these little functional boxes.
1.) Learning how to enclose text and graphics in a border to set it apart on the page.
2.) Learning how to link a button in such a way that it actually opens into a composed tweet, a pin window with image and link already added, or a share window for Facebook.
I can think of all kinds of fun ways I can use the code for specific tweeting, pinning and sharing! It’s all done with a url link, too.
LOOK –> Click here to tweet about this post.
OR —> Share this on Pinterest!
You can use html to add borders to any page or post on your blog. (Divs work in pages, but they may or may not work in WordPress posts. If the editor strips them out, just leave that part off.)
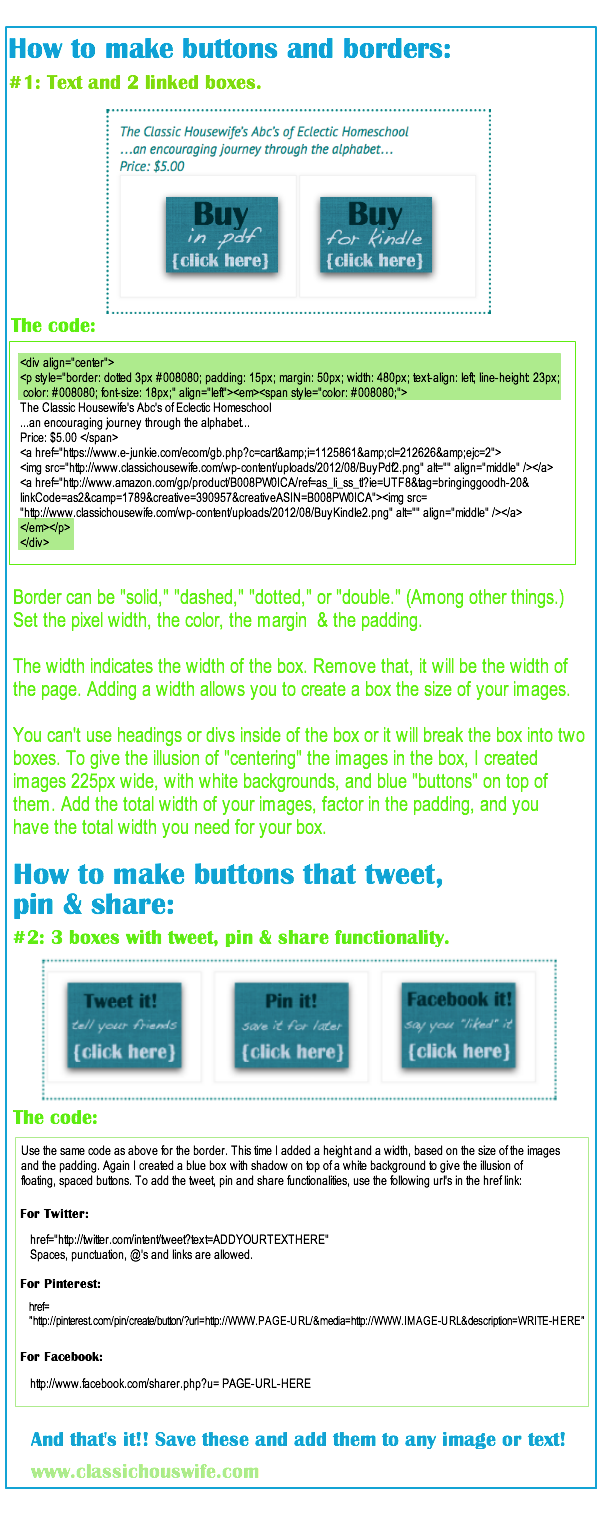
Here’s the code:
(Unfortunately, I don’t yet know how to make code display in a way that you can copy & paste without being active. I’ll add that to my list of things to learn. In the meantime, here’s a simple infographic.)

The images were reduced when I added them to the infographic. To see them in their native habitat, {click here.}
As I mentioned, I’m a novice! If I’ve got something wrong, or you know a better way to do it — let me know, please! Thank you.
