I. cannot. believe. that February is over already! Darn those Olympics, they sure got in the way of getting this challenge done in a timely manner! February had it’s host of other challenges, too. We had an extra kid to homeschool with us on one week. We had really cold weather and snow days on another week (I don’t work well when it’s too cold in the house.) I had to stop working on the office stuff to fix a problem with the bookshelf, purge and reorganize that. Needless to say, this month was busy!
But I got it done, check it out: (If you haven’t been here before, you can read my original post fully explaining my problems and my goals, though I will get into the important stuff later on at the bottom of this post.)
{For a faster, quicker scan, you can read the photo captions and “quoted,” indented sections.}
Before:
After:
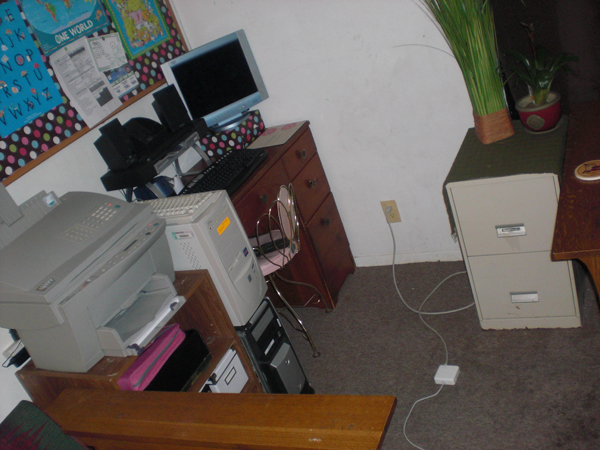
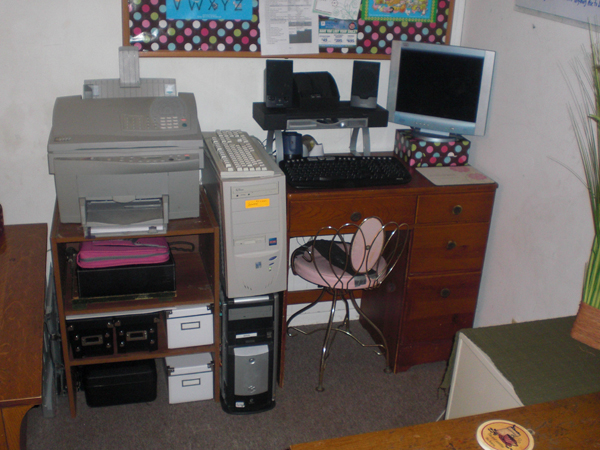
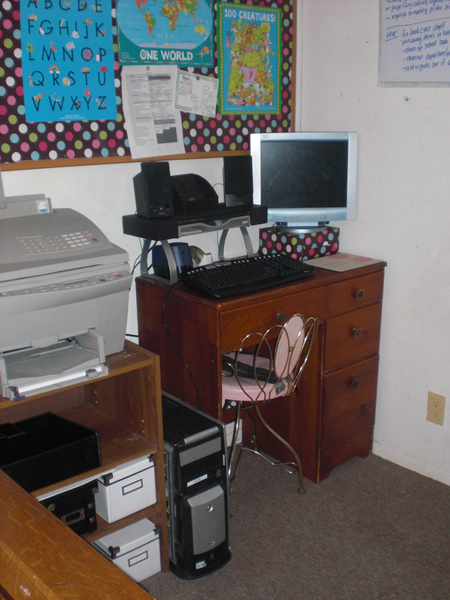
That white “computer” by the desk is actually one of my husband’s client’s servers that he had to hook up to work on. It’s not permanent. Here’s an idea what it looks like without it, taken before a few of the finishing touches were in place:
A LOT of work went into this project, let’s take a look at each piece, shall we?
Printer stand, before:
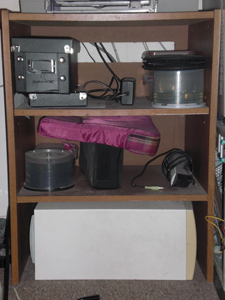
Printer stand, after:
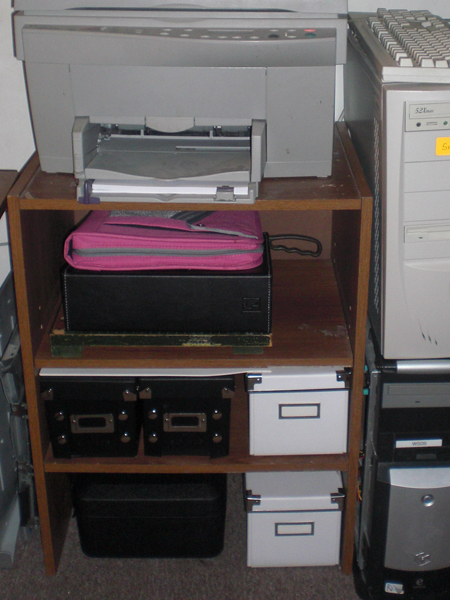
- Top shelf:
- Home management binder– which includes a section for opened mail and action items
- cd/cd-rom binder holding the kids cds and cd-rom games
- paper cutter – better located near the other desk and office items than on the kids school book cabinet in the dining room where it was before.
- Middle shelf:
- 2 black cd cases holding computer software and other cd-roms (and a few floppies I found with pictures that need to be moved to some other media)
- white storage box holding a tub of blank cds
- and some spare legal sized paper I’m not sure why we have (but Little Prince is doing a quick job of using it up for scribbling and creating!)
- Floor:
- Fire proof safe box with important legal documents
- white storage box containing my camera case, tripod, lens cleaner and other camera items.
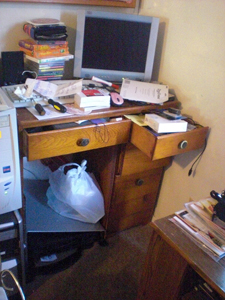
Top of desk before:

As you can see from the photo, the top of the desk was a total mess. It didn’t look like this all the time, but it got like this often–mostly because there was no room in the desk so we’d set desk-ish stuff on top of it. When I did clean it up, we’d cram as much as possible into the overstuffed drawers.
Top of desk after:
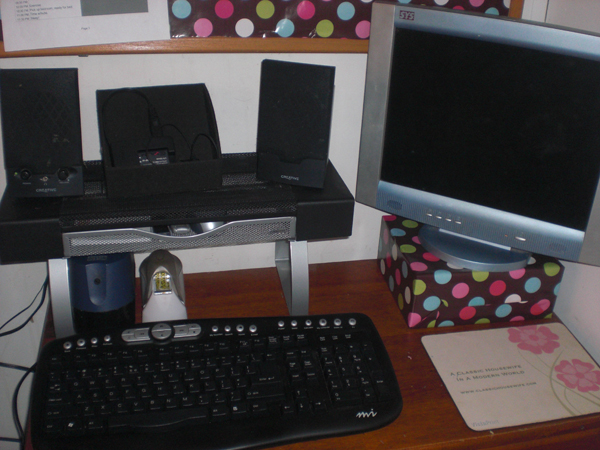
- Storage Stand: The storage stand doesn’t make more room for the keyboard, but it does allow me to use space vertically, bringing in the other desk items that were elsewhere in the house.
- Charger Station – this charger station (for my camera battery and my cell phone) was previously on a shelf above the back of the stove.
- The speakers – were already here, but they took up the space behind the keyboard and now they are lifted up by the stand to make more storage space.
- Under Storage Stand:
- Pencil sharpener – was previously on the school book cabinet in the dining room. Not a BAD place, but better suited near the pencils in the desk drawer.
- Tape dispenser – I didn’t even HAVE a tape dispenser before this project!
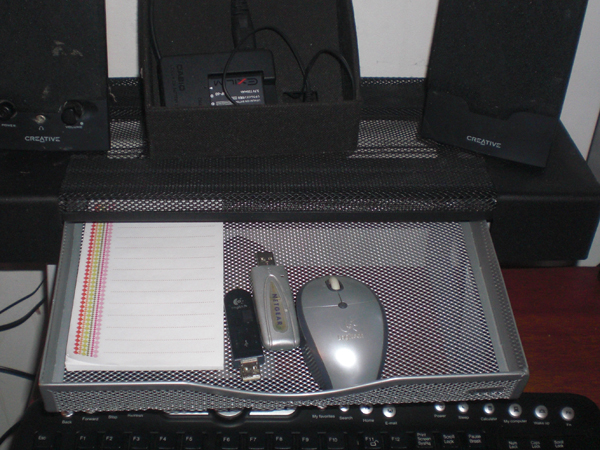
- In the Storage Stand Drawer: (See pic below)
- Notepad handy for quick access.
- USB ports for wireless internet & for wireless mouse – I don’t like to leave these plugged in when not in use because they get bumped by the kids and then bent. =\
- Mouse – we’ve had issues with the mouse (or the port) going missing so now it has a home when not in use, too.

The desk drawers before:
Ummm, I didn’t actually take before pictures of the insides of the drawers. You can see in the before picture above that one of them is open and stuff is spilling out. They were ALL that way. The main drawer was crammed to the brim with papers. The top drawer on the right was full of papers and some office supplies I didn’t even know I had! I found a box of paper clips buried in there among other things. The middle drawer was mostly full of computer software and other discs. The bottom drawer had everything from phone books to papers to magazines and you name it.
I spent a whole day with the girls emptying the desk, sorting it into piles, purging what needed to go, putting everything that needed to stay back in with some organization and putting away everything else. It was a CHORE. But worth it.
The desk drawers after:
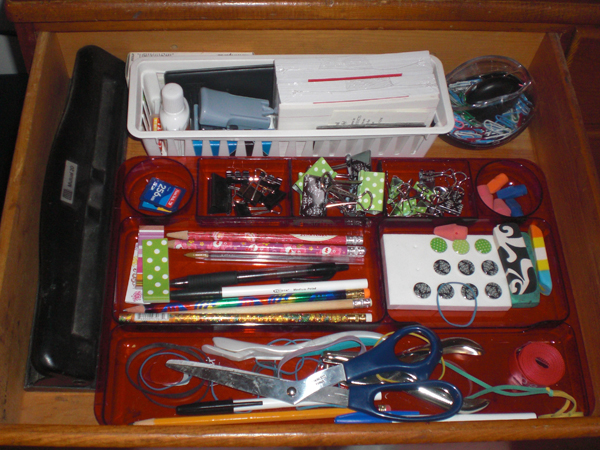
- White basket: stapler, staples, white out, notecards, stamps, thin solar calculator. A second box of staples fits behind the white basket, a paper clip dispenser to the right of it.
- Red tray: Had to go buy this, I didn’t have anything like it. Think I have enough binder clips? A place for everything and everything in it’s place – except the rubber bands, they kinda scatter whether or not you want them to.
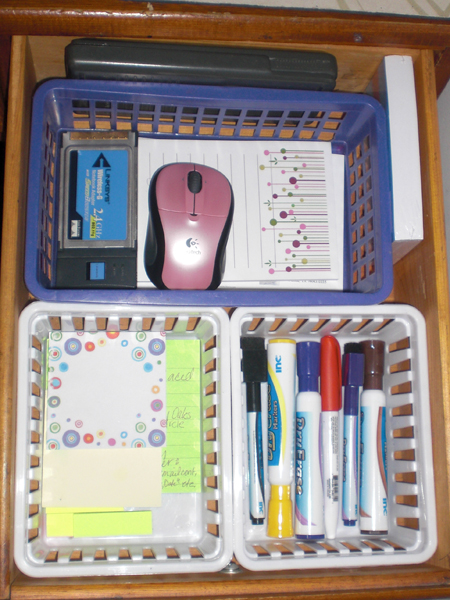
- Purple basket – a wireless card for a laptop, some notepads, and the wireless mouse for Princess’ school laptop. She has a set of headphones for the laptop, too, that are usually in that basket but she was using them.
- Two white baskets – one with various sizes and colors of post-its and the other with the dry erase markers for the white board that hangs just above where this drawer is.
- Also here, a fancy calculator my parents bought for me in high school and another pack of notecards (see? They were buried so I didn’t know I DIDN’T need to buy more!)
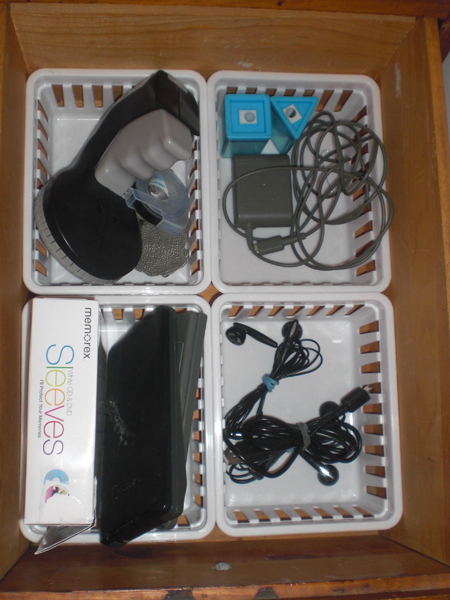
These white baskets (and the two in the drawer above) were 3 for a dollar! What a deal! These hold my labeler (which has never had a good home – HEY!! I should go label all these baskets!!,) some extra chargers and headphones, paper sleeves for disks, two pencil sharperners and two fancy calculators that still work– I haven’t decided if I am keeping them or not.
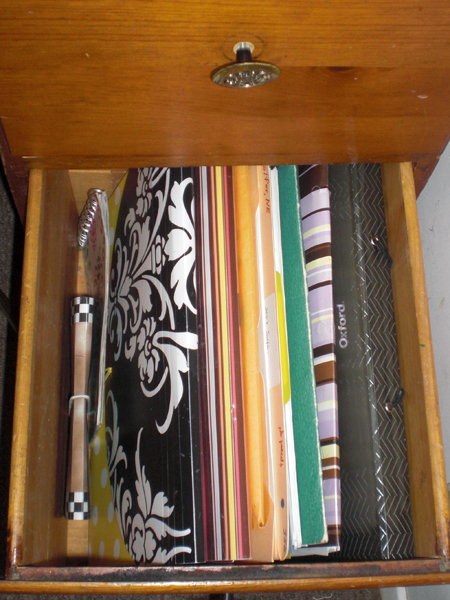
These folders and such actually hold several projects in the works, such as our 2009 taxes for one thing! Also here, a coupon holder.
Filing cabinet before:
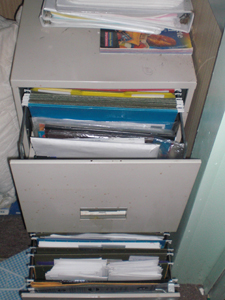
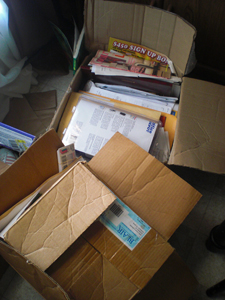
Filing cabinet, after:
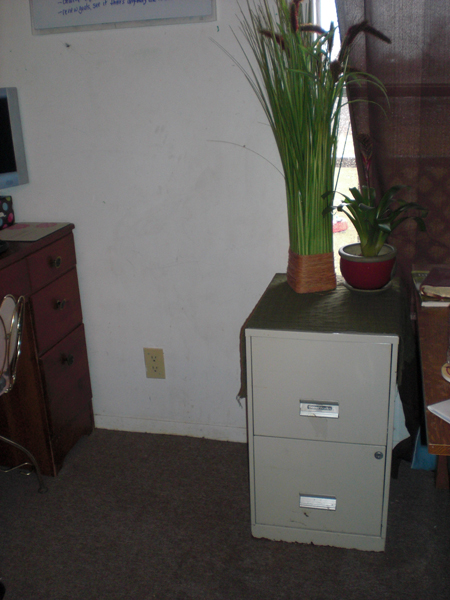
I don’t have pictures of the inside, but really it’s just a bunch of folders. The real work is evidenced by the lack of boxes in my dining room. I purged some from the file cabinet and then went through every single box. I threw away 3+ trash bags full of stuff I didn’t need to keep, junk mail, and so on. I also purged this box of magazines:
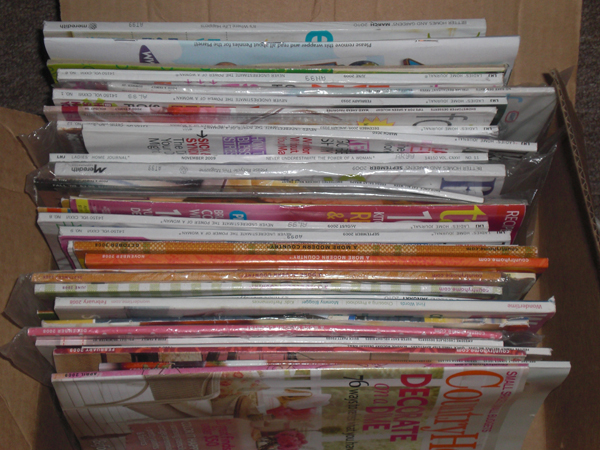
For the record, I don’t pay for any of those. I’m not wasting money on magazines I’m not reading. In the future, I will put a magazine out on the counter or on my new “end table” to look through as soon as I get a chance to sit down – something I have done with the last couple of magazines I received. I also like to plug my laptop into that nearby outlet and set it on top of the file cabinet to charge, as opposed to sticking it on the floor under a chair as we usually do.
Creative Solutions:
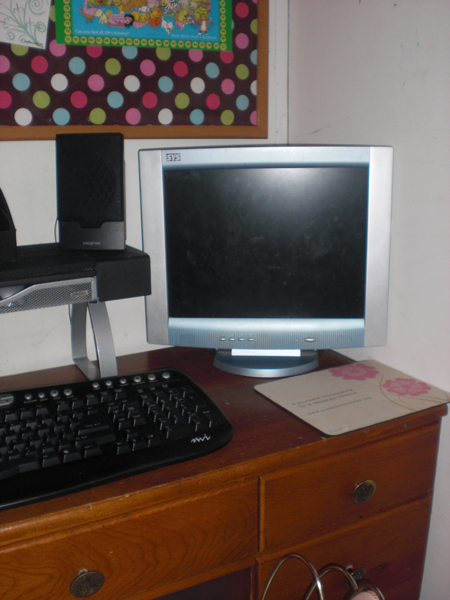
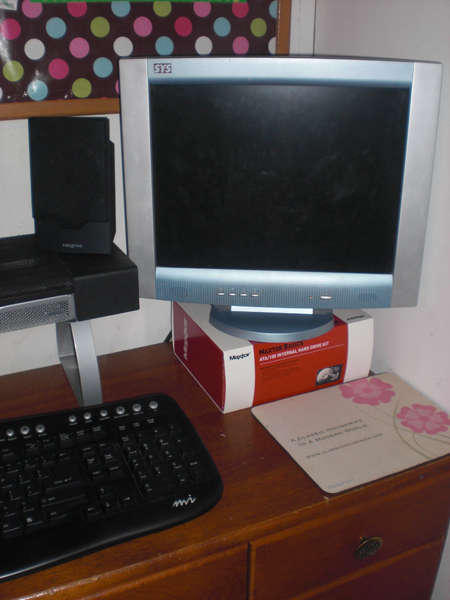
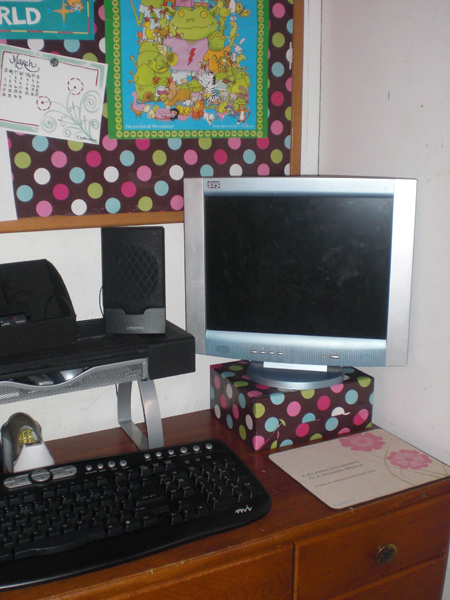
While doing this I found that the monitor on the desk really needed to be raised a bit. I’d hoped to put it on the media stand but that really raised it too much. I found my solution with an old box and some leftover wrapping paper from the bulletin board.
More organizing:
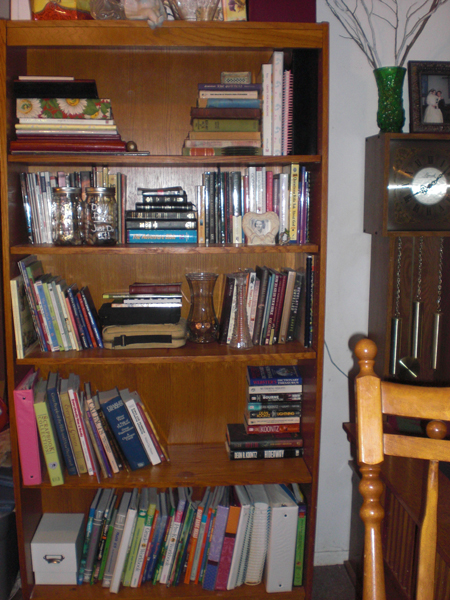
While I was trying to get this done for the month, I got temporarily derailed on an additional project – two of the shelves on the bookcase had “collapsed,” presumably from too much weight. I stopped to purge some of those books and also to combine some of the pictures and yearbooks and that sort of thing with some pictures and other memorabilia I found while purging the desk and filing cabinet. I boxed them all up for a later project of purging and sorting which items are worth keeping and which items are worth parting with. I need to work on that at a later date because there are probably plenty of pictures I’d like to scan in and keep that way and I need to wait until I get my scanner working.
We also had to move the tv stand the aquarium is on (back to it’s PRE-CHRISTMAS TREE location) to make room for the file cabinet– which led to further organizing the media housed on that stand. Because some of the movies and cds and games were all mixed together we had to work on that simultaneously, sorting which was which and organizing it as we put it away. We have a second binder identical to the one for the cds that we have the DVDs in and two more of those white storage boxes – one for nintendo DS & games and one for cd players & headphones. Those white boxes were four for $6 at Wal-Mart, quite a good bargain!
Additionally, this also led to working on purging and re-organizing the kids school books and cabinet in the dining room (since things were getting shuffled around a bit.)
None of these are office-related things, BUT, that just goes to show how contagious organizing is, AND, how one project can affect another! Like the domino effect, it’s the organizing effect. ; )
My Goals:
Time to see if I met my personal goals for this challenge!
- I want to set up a system that will easily move into the next house, making setting up a home office easy to do.
- Done! All the pieces of the new system are rearrangeable and flexible and can easily be moved over and implemented when we move into the new house. Incoming mail no longer has a basket or drawer (I fill it up and let it pile up) but has a section in my home management binder so that it needs to be opened and hole-punched relatively quickly. There are project folders in the big desk drawer, including one for 2010 taxes where bank statements and other records can be immediately filed. There are folders in the filing cabinet (that I can now get to!) for owner’s manuals, service contracts (like cell phones) and all the other paper documents that occasionally come in. Regardless of how these things are rearranged in the new home office, these pieces will still function together.
- To do that I need to purge EVERYTHING that I don’t need or intend on using any time soon.
- Done! With two minor exceptions (hanging on to two expensive calculators until I determine what to do with them, and needing to purge photos and memorabilia a bit more than what I have done already,) I purged ruthlessly — and did I mention I threw away over THREE bags of paper trash?
- I need to use storage options that are easily transferable for new spaces and arrangements, that are flexible, inexpensive and space-saving.
- By using small organizing containers in similar style and color scheme (black and white,) I’ve set up a system that can easily be moved over, rearranged and organized into our new office space when we move. The containers are versatile for storing different items, and they were inexpensive and affordable.
- My desk needs to function as more than an oversized monitor stand. I need it to hold everyday office supplies so they have a place to go (top two drawers.) I need it to house some kind of system for incoming mail and “action” papers (middle and bottom drawer.)
- Done! I decided to forgo the “action papers” drawer (see above) but the desk is now completely functional. This was the first thing we did, near the beginning of the month and the organizational system we have put in place has worked well! The kids and I can easily find and get to our pencils and pencil sharpener, dry erase markers and so on. The charging station works well there. The storage stand can easily be put to good use in the new office, even with a bigger desk.
- The printer stand has space WAITING to be put to good use, and we have a ton of cd-roms, power cords, and chargeable devices that need good homes. It’s a perfect match.
- Done! The printer stand serves as a great organizing station for all of the media and electronics that we pulled out of and around the desk, such as computer software and my camera equipment. When we move into the other office, I plan to use wall shelving to hold the various storage boxes. I’ve thought that perhaps I’ll use the printer stand as a laptop charging station – so that they have HOMES to sleep in when not in use.
- The file cabinet needs to be moved out of my closet, further organized, purged where necessary and then put to good use. Moving the fish tank back to it’s previous location (it moved to make room for the Christmas tree) will make room for the file cabinet to go by the desk.
- Done! The stand the aquarium is on was returned to its original location and not only did the file cabinet fit at the end of the couch nicely but it left plenty of room for sitting at the desk AND it serves nicely as an end table for the couch! There was plenty of room to sit in front of it and organize papers into it, too, so I know that it will be easy to access on a day to day basis. At some point in the future office, I hope to replace this with a larger file cabinet. The well organized files within will be easy to move over and organize into a bigger space.
- I need to purchase a fire proof box to create a an “emergency box” that can hold all the important documents that need to be saved in case of house fire or other emergency.
- Done! I purchased a relatively inexpensive fire-proof safe box at Wal-Mart for just under $30.00. Right now it only has our vehicle titles and some of our social security cards… we have some other documents in my parents’ safe that we can get from them the next time they come up so that everything is in one place! I also plan to use it to store backup disks for Quickbooks and school, etc — once I HAVE some back up disks made! Now I feel a little better knowing that if there were a fire some of our documents would be protected.
My Process
My “plan” was to follow Laura’s P.R.O.C.E.S.S. as closely as possible. Because of the nature of the project (and my available time in one sitting), I did tweak it just a bit. That is, I had to repeat parts of the process in stages for different sections of the project. My process went as follows, each of these steps was completed on a different day.
STEP 1: Make a plan and set goals for the whole system, assess needs, examine existing storage soltutions, shop for specific storage solutions I already knew I was going to need.
STEP 2: Remove everything from the desk, organize it into piles for “back into desk,” “file cabinet,” “printer stand,” “trash,” “donate,” and “elsewhere in the house.” Containerize desk items with available storage solutions, discard trash, put away things that belong elsewhere in the house, bring in other items from the elsewhere in the house (chargers, pencil sharpener,) add the “file cabinet” and “printer stand” items to the other existing items for those locations for organizing and containerizing at one time. Evaluate plan, re-locate, re-organize, and shop for additional storage baskets based on observations during the sorting process.
STEP 3: Remove everything from the printer stand (including items from STEP 2), organize it into piles for “back on the stand,” “file cabinet,” “purge,” “donate,” and “elsewhere in the house.” Containerize items and arrange on the printer stand, discard trash, find homes for things that belong elsewhere, bring in other items that need to be housed here (paper cutter, home binder, fire safe.) Evaluate plan, re-organize as needed.
STEP 4: I DID NOT REMOVE EVERYTHING from the file cabinet, since there was a little bit of organization in place already. What I did do was go through every folder and remove anything that I didn’t need to keep anymore, or didn’t want to keep in there anymore. Then I went through every box (5 or 6 of them!) and organized them into piles for “trash,” “file cabinet” “daily management binder,” “2009 taxes” and “2010.” Then I went through each stack and containerized them (a.k.a. filed them) into their appropriate locations. Next step, evaluate, adjust if needed.
STEP 5: Solve/Simplify anything that isn’t working. I’ve done very little tweaking, actually. We’ve been using the desk as it is for most of the month, the printer stand for at least half of the month. It’s all working well.
STEP 6: Smile! I am! I love how clean and uncluttered this area is now!
By following the middle part of the process for each section and then repeating, I was able to gather ALL the items for each section and evaluate them all at once. Since I wasn’t able to complete the whole project in one day, this was the best approach, so that I didn’t end up finding forgotten or newly discovered things later and having to backtrack or repeat.
Laura’s Challenge Questions:
1. What was the hardest part of the challenge for you and were you able to overcome it?
By far, the hardest part was sorting through the boxes of paperwork because it took the longest, made the biggest mess, was the least fun, … not to mention that it dried out my hands and I got papercuts! How did that happen? How did they get there? When my “mail organizer” came down in May for the kitchen remodel (and never got put back up – in fact that whole system there, with calendar and home management binder never got re-instated there or anywhere else) I stopped having a way to handle incoming mail. Things got stacked and piled and eventually (when company was coming over most likely) shoved in a box for a quick out-of-sight “solution.” The only REAL solution to this problem is to handle mail and other papers when they come in, mail sorter or not. My hope and my goal is that by not giving myself a collection basket or bin, but by making all the filing places more available and handy, I can learn to deal with incoming papers appropriately and not let them pile up in the first place. I’ve done it before. Time will tell.
2. Tell us what kind of changes/habits you have put into place in order for your area/room to maintain its new order?
For starters I got rid of A LOT of stuff. The real impressive part of this challenge is not how much stuff I organized but how much stuff did NOT go back into these spaces! By keeping things simple, visible and easy to use, it will be easy to maintain. The main things I’m concerned about getting unruly and needing habits for keeping them in check are 1.) the desk drawers, 2.) the mail and 3.) the kids’ cds and cd-roms. To keep these in order this month I’ve stayed on top of the kids for putting thier discs back in the binder immediately and putting it back on the shelf and I’ve kept all of us in line for putting scissors and pencils back in the desk when we are done with them and so on. The good thing about the desk drawers is that the kids really only get into the long skinny drawer so they shouldn’t be messing up the others. ;0) As far as the mail goes, I’ve already switched half our small number of bills to automatic drafts and paperless billing a few months ago so I’ve decreased the amount of incoming paperwork coming in and that will be a BIG help!
3. What did you do with the “stuff” you were able to purge out of your newly organized space?
Some of the stuff I purged needed to go somewhere else so I put those things where they belong and made homes for them if they didn’t have one. Much of the stuff I purged was trash. I REALLY WISH I could say that I hauled all that paper trash to a recycling center. We live in a very small town and I’m not aware of any local paper recycling places. It’s been a few years since I looked, perhaps I should look soon to see if anything new has popped up. Unfortunately I had to take it all to our dumpster. Some of what I purged will be going into an upcoming yard sale to benefit our homeschooling group.
4. What creative storage solutions were you able to introduce in order to create additional space as well as establish some limits and boundaries?
Aside from the creative monitor solution (does that really count as storage?).. my main goal here was LOW COST storage solutions. I was very blessed that my kids tolerated my scouring every aisle of Wal-mart looking for affordable basket options for the middle desk drawer. I had found something cute that was 3 dollars a basket but that was going to add up to more than I wanted. When I found the 3-packs for $1.00 and they were the perfect size (I’d measured before I left) I snagged them up right away. And really, in the end it was a better deal because I was able to use the two remaining white baskets in the drawer above it an they fit better than the basket I had their first. Also, the white boxes (4 for $6) were a great find. I used them to hold odd and irregular shaped items like the cd players and my camera equipment. Not only does this contain them all together but by doing so it adds to the uncluttered look of the whole space.
5. Why do you think you should win this challenge?
I’m sorry, I haven’t looked at anyone else’s space yet so I don’t know what I’m up against but…. I totally ROCKED this challenge! I’m sure everybody else did, too! ;0) My main goals here were to 1.) Stick to Laura’s P.R.O.C.E.S.S. 2.) Complete ALL of my goals and 3.) make changes that could last while focusing on the present. It was easy for me to daydream about all the things I’d like to have in my future office – I had to reign myself in and not think about things like buying a file cabinet.. or a desk chair! I had to focus on what I needed to do to accomplish this challenge. And I stuck to it. I bought only what I needed. I met every single one of my goals, and I followed Laura’s P.R.O.C.E.S.S. What more could you ask for?
I’ve also laid it all out here as clearly as possible in what could possibly be THE. LONGEST. post I’ve ever written! Good thing there’s not a maximum post length requirement for this. =P
OBVIOUSLY, regardless of who wins, I’m very happy with having FINALLY gotten this done and off my back. I feel a huge weight lifted. (Now to lift a few more of those weights!)
We have finally reached the end, I have nothing more to tell. This is what I have done with my February…to see what everyone else did last month, you can find all the other Small Space Category entrants here and also the Whole Room Category entrants here.

Wow, you did a great job with this challenge!! The office looks great! Go you!!!
Thanks! It’s really just a corner in my living room.. but we’ll have a room for an office soon, so I was considering that as I worked through the challenge.
wow! you did rock this challenge! Oh, the (free) magazines that pile up in my house too. I wish I had time to read them!
.-= Jessi´s last blog ..The PROCESS =-.
Wow, congratulations! This is a real transformation! I thought I’d make a suggestion — you should try going paperless. Get rid of the bulky printer, condense your files, and streamline your workflow to be computer-centric. Here’s a blog post I found that talks about using Office Live Workspace to create an online backup of your files: http://ask.officelive.com/workspace/blogs/workspace_team/archive/2009/05/19/back-up-your-files-to-a-workspace-and-get-some-peace-of-mind.aspx
Best of luck staying organized!
Cheers,
Kim
Microsoft Office Live Outreach
Thanks, Kim!
We have gone mostly paperless with our bills.. Our local electric coop isn’t quite as caught up with the digital age as some of our other utilities are. But for now the printer has to stay – it’s an all in one and really comes in handy with the homeschooling. In the future, I’d like a newer, smaller one but that of course, costs money. And since this one still works… well, that will have to wait for “some day.” =)
[…] Winner ~ A Classic Housewife […]
Wow! I just got lots of great ideas from your challenge! Congratulations on winning!!
[…] figured out a way to pay with “Thank you’s and pretty smiles” but I DID just revamp my office desk and bill system to make sure the MONEY makes it to the bill collectors on time. (They’re not […]