[maxbutton id=”2″]
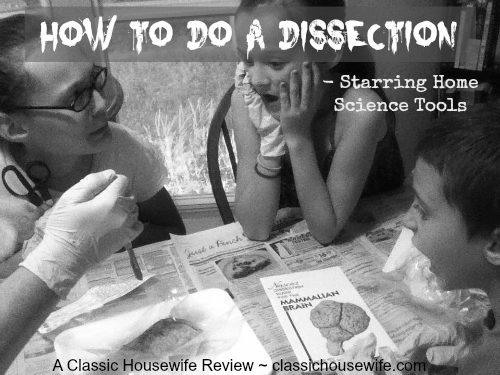
When I think about 7th grade science, I think “dissections.” What about you? Did you enjoy them, hate them, avoid them? We were blessed to be in a school where we could work on dissections individually or in pairs. I never minded doing dissections and I knew since beginning this journey that dissections were one of those “public school experiences” I wanted my home schooled kids to be able to have. Aren’t my kids lucky?
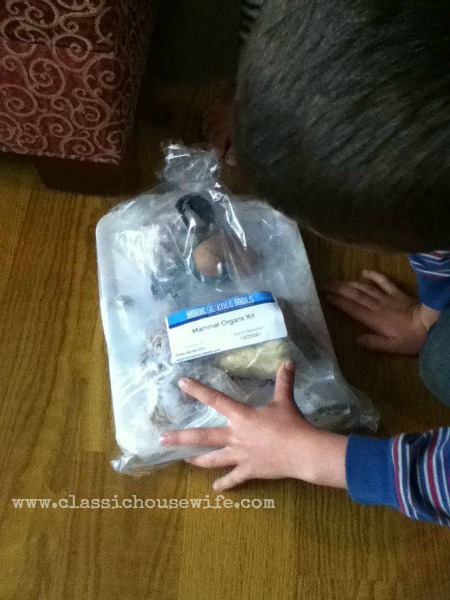
Our first home dissection was an owl pellet dissection a few years ago. In fact, I think that was actually my first experience with Home Science Tools, too. The kids loved that one! We waited a little while (for them to grow a little older) and last week we dove into the REAL dissections with a “Mammal Organs Dissection Kit“— compliments of Home Science Tools so that I can show you all the pieces, tell you all about it, and let you see it “in person” so to speak.
Inside the Home Dissection Kit
I know many of you are squeamish – don’t be! Come with me and take a peek inside the box.
~ All of the “parts” come enclosed in vacuum sealed baggies, labeled and ready to go.
~ In addition to the organs you’ll find instructions for each.
~ Some dissection kits come with tools, the Mammal Organs kit doesn’t. (I knew that was okay because I knew that grandma had what we needed! But if you don’t, you’ll need to make sure you get some tools, too.)
~ The kit does, however, come with some nifty Styrofoam trays to perform the dissections on and protect your table. Bonus points for the Styrofoam trays. =)
Back to the instructions.. this is great for the mom who is willing but doesn’t know what to do. You don’t have to! (And that was me, willing but uncertain.) The directions tell you step by step what to do and how to do it.
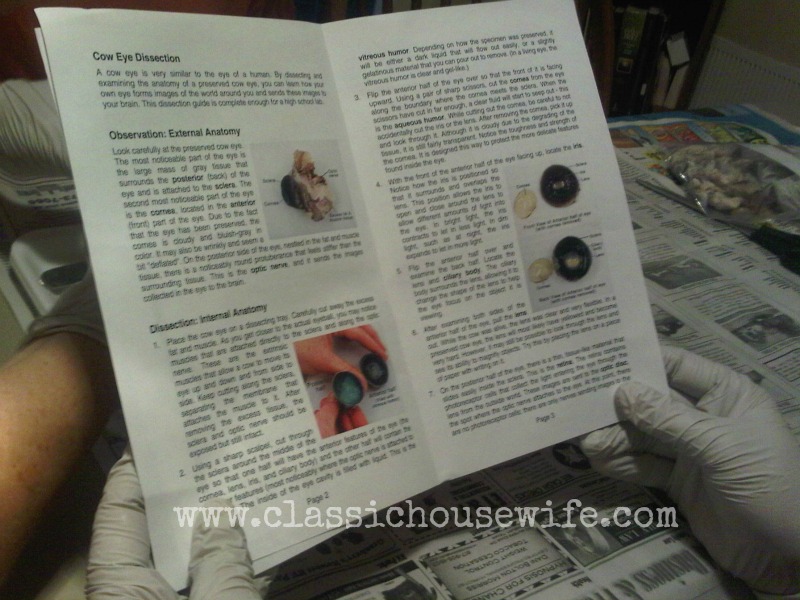
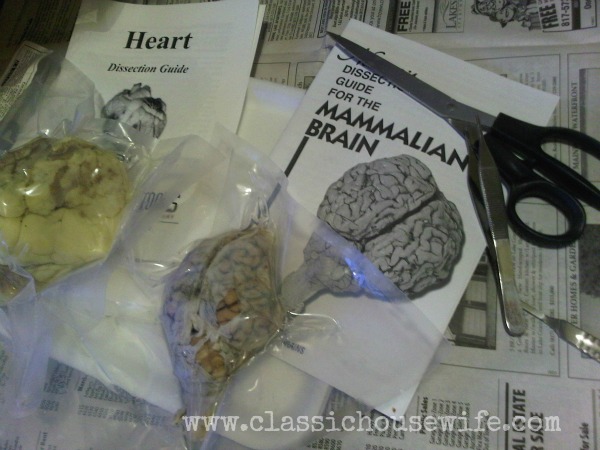
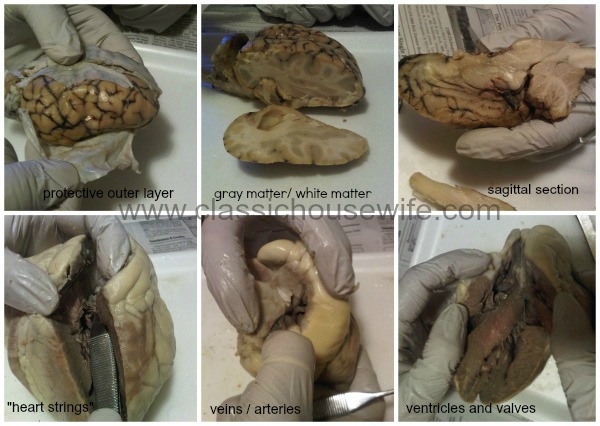
Depending on the age of your children, they might have some large vocabulary words you’ll want to look through beforehand. I counted that a benefit as my children learned what “anterior,” “posterior” and “sagittal” meant! The directions for the cow eyeball and the sheep heart were the most colorful and easy to understand and exceptionally helpful.
Performing Your Home Dissection
Before you begin, you’ll want to make sure that you have everything ready to go. You’ll need:
- plenty of time
- a well ventilated area
- a scalpel, small scissors, probe, tweezers, etc.
- some protective gloves, (protective eyewear would be good, too)
- some newspaper to lay down on your work surface
- a few small trash bags handy
- your dissection kit with directions, parts and trays
Read through the directions once or twice to make sure you understand what you need to do. Take the opportunity to discuss new words with the kids or review some vocabulary words they should already know but may have forgotten. Now you’re ready to begin. Let’s go!
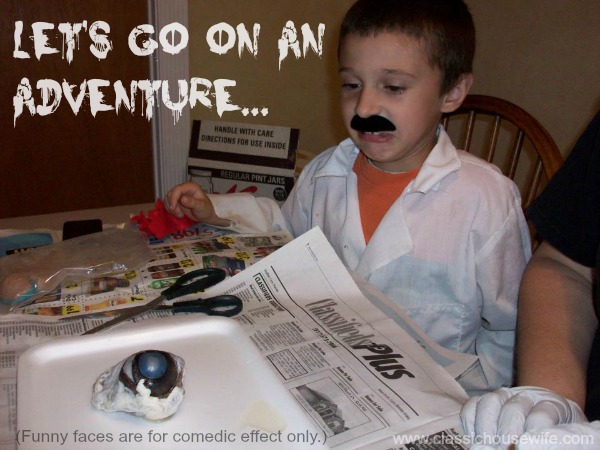
Let’s Go on an Adventure with Home Science Tools
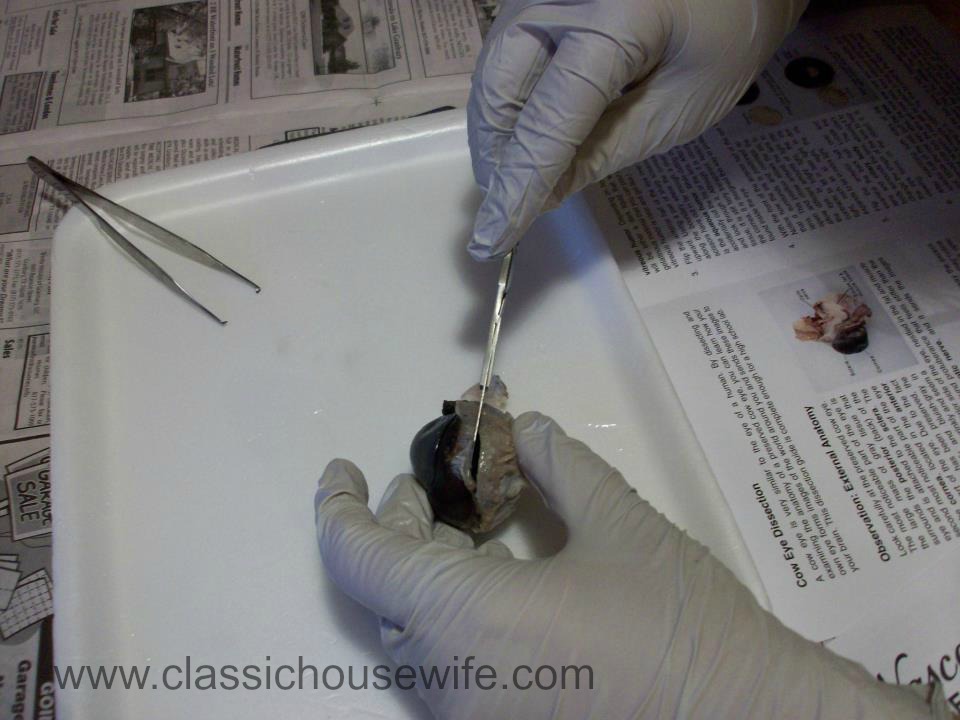
I urge you to cast your reservations aside and take a huge leap toward earning a “Seriously Cool Mom Award.” You can do this. Let’s roll up our sleeves and take a journey through the cow eyeball, shall we?
The cow eyeball was hands down the home dissection that everyone loved the most. The kidney and brain were interesting, the heart was too, but the favorite was the eyeball. (Was it the gross factor? To some extent, perhaps..)
Before you begin dissecting, start with observing. What do you see? How does it feel? What is this down here or that over there? Take plenty of time holding it and passing it around so that everyone has a chance to examine it.
The really cool thing about dissecting these animal organs is that they are very similar to the anatomy of our own organs. Not only did we get to observe the animal anatomy (as we are studying land animals in science this year) but we also got to observe how our similar human anatomy works (which we studied before this.)
As we examined the cow eye, and all the way through the dissection, we observed and discussed similarities and differences between the cow eye and a human eye. We found the optic nerve coming off the back of the eyeball, we found the sclera black instead of white, and so on. Once you’re done observing, you’re ready to take a look inside.
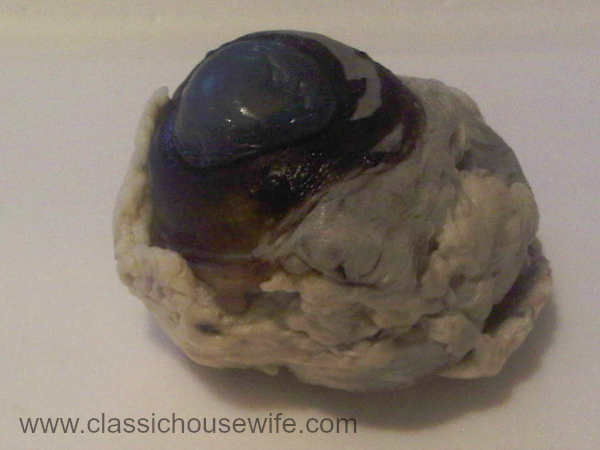
Our cow eye was really well preserved because the vitreous humor inside (the clear gel, aka, the gross stuff) was still clear and gelled. Inside the eye we were able to observe the shiny inside of the cow’s eye (that animals have and is responsible for “eye shine” at night), called the choroid coat.
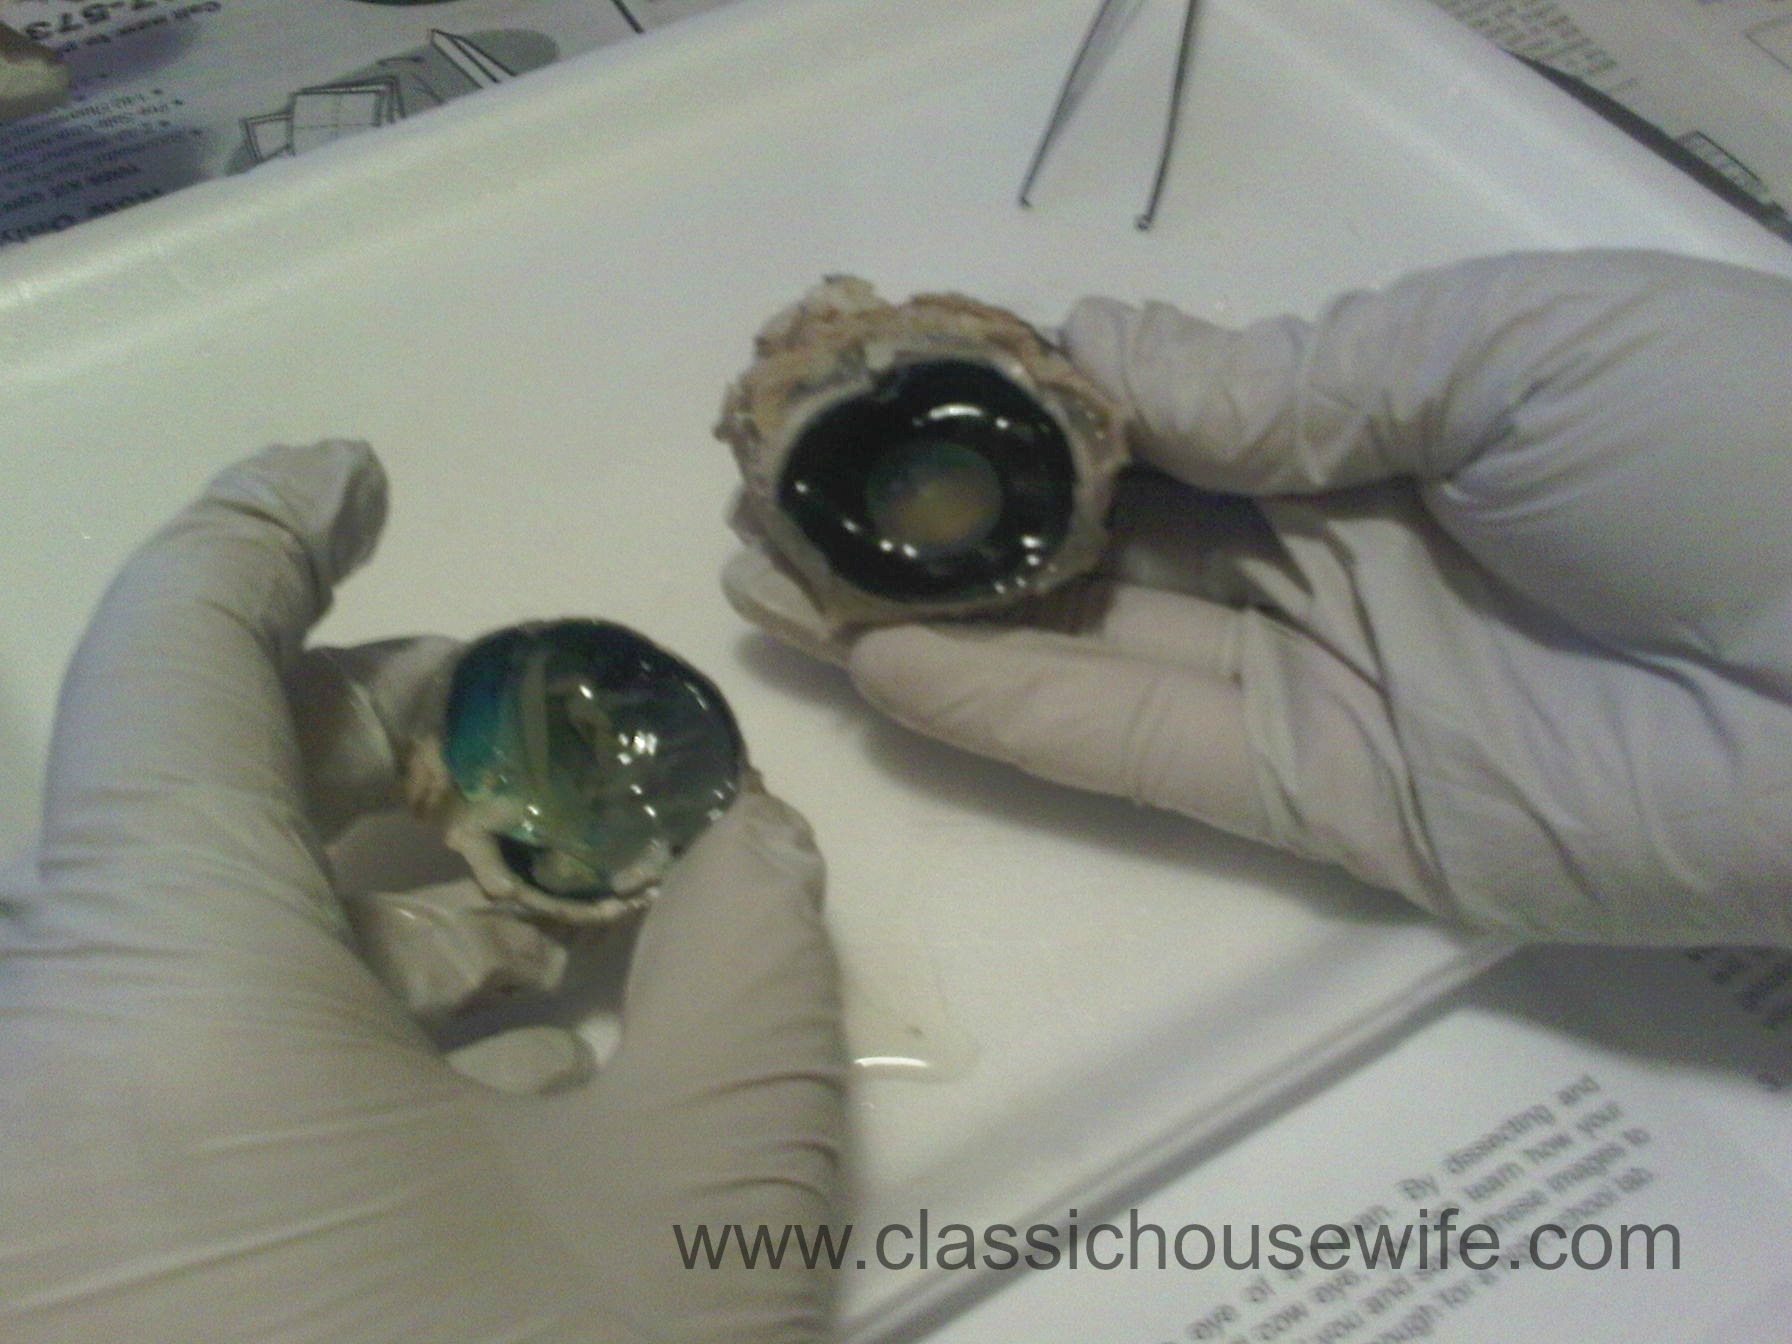
We also found a teensy hair of an optic nerve sticking up inside the eye ball (TEENSY!,) found where the vessel attaches at the retina (causing the blind spot,) observed the muscles of the iris, and examined the cornea.
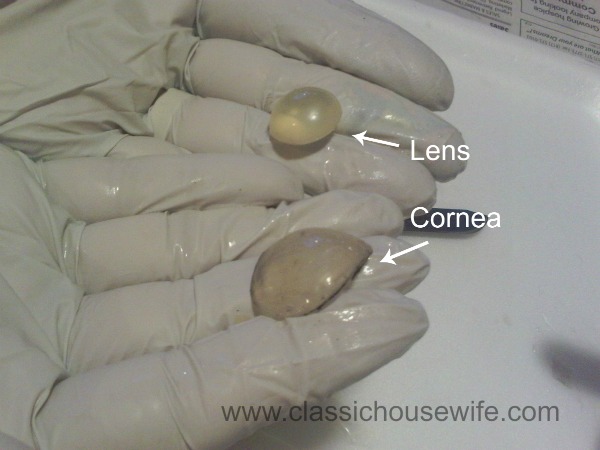
By far, the coolest, neatest, most amazing part was holding the lens in our hand. We all got a thrill out of setting it on the newsprint to watch it magnify the letters. We were all amazed at the Skittle shaped disc that floats in our eye behind the iris, bringing our world into focus. God’s creation is amazing!
Clean up and Safety for Your Home Dissection
You might be concerned about the preservative – what about the formaldehyde?? Home Science Tools uses a low odor formaldehyde (though we noticed some parts were stinkier than others.) Still, this is why you need a well ventilated area, gloves (and preferably eye goggles.) We discouraged the kids from touching the pieces without gloves, and from touching other things (phones, cameras, their face,) while they had their “contaminated” gloves on. We wanted to be able to experience this home dissection for ourselves, but we also wanted to be safe and smart, too.
Safety and easy clean up is also why we kept several small plastic bags handy. As we trimmed away pieces for the dissection (eye muscle aro eye ball for example,) we placed it off to the side in a bag. When we were all finished, we added the rest of the specimen into the bag as wellRolling everything up in the handy newspaper we covered our table with, we tied the entire roll up into a second trash bag to discard. The last step for safety and clean up is to wash everything down – table, tools, hands and arms, with a good dose of soap and water.
For more information about storing and discarding, check out this list of FAQ’s at Home Science Tools.
After the Dissection
Are we going to do another? Yes we are.
All three of my kids are agreeable and Drama Queen is actually quite excited and can’t wait to do another. She circled almost every other dissection kit in the catalog. ; ) We’ll wait a little while but I hope to do at least one a year.
In the mean time, I wanted to take a little time to “cement” what we had observed in our dissections. When we were finished I asked questions about what they saw, what they remembered or had forgotten, what they learned. I quizzed them on the new vocabulary words and what we had seen.
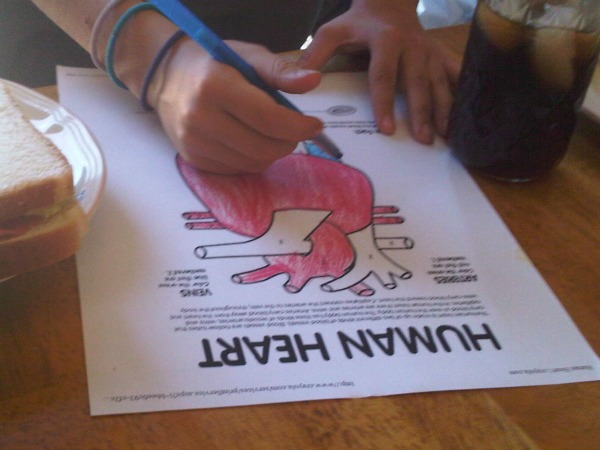
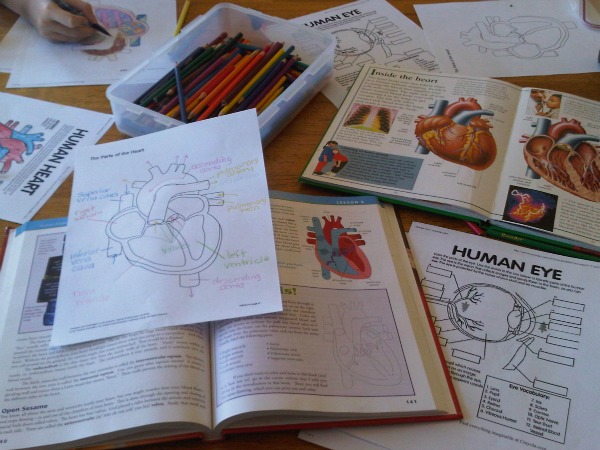
A few days later I printed a few coloring pages and we went over it again, drawing on our memory from both the dissection and our science class from last year as we labeled and colored. We may forget some of the terms and vocabulary again but I have no doubt that the memory of the dissection will stick.
(P.S. If you’re wondering: The two books in the picture above are our Apologia Anatomy Book and the The Kingfisher First Human Body Encyclopedia.)
Do you feel empowered yet?
I hope I’ve given you a little bit of confidence in the home dissection department. If I can do it, you can do it!
It is true that we all went over to my mom’s house and that she and I both took turns cutting and manipulating – that was mostly because I needed a second set of hands for taking pictures, and because she had the scalpel, and because she wanted to do it, too. I would have completely been able to do this on my own, and you can, too. However, if the “safety” of doing it with a friend is what you need to help get you through this, go for it!
Get Your Own Dissection Kit (Or Something Else) With a Home Science Tools Gift Card

Home Science Tools is going to be giving away two $25 gift certificates to their site at next week’s Mommy Time Party! This would be a great opportunity to try out one of their home dissection kits. Or if you’re not quite sure you can stomach that, they also sell science kits for many popular science curriculum (such as Apologia and Sonlight) and a ton of other great science products. My 7 year old has his eye on this engine kit and this physics set! There is something for everyone. The giveaways will go up next Tuesday.
In the meantime, you can find Home Science Tools on their website, their Facebook page, and on Twitter. Click here to read more about the Mommy Time Party.
PLUS! For Classic Housewife / Mommy Time fans, here’s a special discount code: use “CLASSIC13” for 10% off through June 15, 2013.
So Let’s Recap:
- Prepackaged and ready to go
- Step-by-step directions
- Hands on Science that makes a lasting memory
- Easy to follow and understand
- You can do it with a friend
- Affordable – very budget friendly
- You are one very cool mom.
A very special “thank you” to Olivia and Home Science Tools for working together with me to bring you the awesomeness that is a home dissection. Thank you so much for providing the dissection kit for me and for helping me make the Mommy Time Party a success. All opinions stated here are my own. For more information about how I do reviews, check out my Disclosure Statement and Review Policy.


I feel totally empowered! We’ve been working on life science all year and will be doing an intensive Human Body unit this summer. I am going for cool mom award and ordering up some organs! Thanks Amber.
Woohoo! Go Cool Mom! ;0)
We just dissected a shark this week and wish I had read this first. Thanks Amber!
We just dissected a shark this week and wish I had read this first. Thanks Amber!
[…] Two $25 gift certificates from Home Science Tools […]
Sounds fun! Would love to win this!
Oh the cow eyeball! I did this homeschooling! Fun!
I had almost forgotten….
How cool! My kids would love this!
I love science. I look forward to my kids being big enough to want to dissect things. It’s fun!
So cool! Thanks!
My boys would love this!
thanks, my 11 daughter love science, this is great.
we would love this
I’m so excited that you shared this awesome company!! Now I know where to go when I’m in need of some cool Science stuff!! We are going to a BLAST!!!
Wow never knew anyone sold this stuff, so cool
I just discovered that Home Science Tools has the kit I want for next year’s science, and at much lower price than others that I’ve seen, hooray!!
My biggest struggle with teaching math is taking the time to learn the lesson before teaching it to my daughter. We learn the lesson together, which works when it’s an easy concept. We’re working through Algebra 1 (my third time as a teacher, so you would think this would be easy!).
Wow! This is some exciting Science tools. I love it, and I know my kids would too.
Have purchased from Home Training Tools for years. This year we did the starfish and fish. Love their stuff!!!
[…] Two $25 gift certificates from Home Science Tools […]
Thanks for all the info and the pictures, I’m very visual!
Great post! Thank you for making dissection seem so much less intimidating! 🙂
[…] Two $25 gift certificates from Home Science Tools […]
[…] Two $25 gift certificates from Home Science Tools […]
This looks like a wonderful company with some neat stuff.
We have never dissected anything. This sounds interesting!
I have never used Horizons Math before but I am looking into it for my soon to be 2nd grader!
[…] Two $25 gift certificates from Home Science Tools […]
I think I can, I think I can….
Never tried Horizons math. 🙂 I always got squeamish during dissection in High School!
[…] Two $25 gift certificates from Home Science Tools […]
Oh my! Our family would LOVE to do this! I may have to look into this for next year! One question….did you do all the organs at once, or spread them out and do maybe one a week for several weeks?
We have done so many dissections when my big kids were homeschooling. Its time for round two! And Horizons Math? Used it for my daughter in 2nd grade.
I plain don’t like math.
And though I do enjoy teach much about science, I’m not big on dissecting.
My children on the other hand are all into it! The younger ones now have older siblings who happily assist in gorey activities like this.
Thank you for participating in the giveaways:)
Just getting my boys interested in math. They fight it.
My youngest is 3. We are just learning numbers at this point.
We have not used Horizons Math. My daughter does OK with math but would much rather be reading or doing art so just keeping her motivated about math is the toughest part.
We are finishing Apologia Biology this year. We were brave and did all the dissections. It was a great learning experience for my high schoolers!
we love horizons math
Never tried Horizons Math, but the kiddos love Science and have begged to dissect everything 🙂
I enjoy teaching elementary math, but when I don’t seem to be able to get something across to one of my kids I ask my husband to explain it. He likes math and we have different teaching methods, so it usually works fine.
My biggest challenge in teaching math is paying for the curriculum.
debating on whether or not to use Horizons for math. Dissection! eek! that will be hard for me to teach, but im certain my boys will love it!
*kelly
kelly-tillotson@hotmail.com
Math…my biggest struggle 😛 I would give it up completely if I could lol!
No, I haven’t used it.
Not having enough math manipulatives to use is a challenge and I’ve not used horizons.
keeping my eldest on track now that’s it’s approaching algebra. it’s Greek to me!
My kids are a little young for dissection yet but we are certainly in need of some other science tools!
I have used Horizons Math for my two daughters from kindergarten to 5th grade.
We’ve not used Horizons Math. Since this post is about dissection, I hope to use kits like this to make things easy. We’ve butchered animals (homesteaders and hunters here) so not squeamish, just not sure what we’re looking at sometimes.